Do you find that you go nuts on certain vegetables and fruits when they're in season? I do. In the Spring it's all about the asparagus. In the Fall I'm making apple-everything. And the Summer? The bountiful Summer is a very happy time for me, but I find I can only truly fall in love with a tomato during the height of summer tomato season, so they hold a special place in my heart during this time. This is especially true when my basil plants are gigantic and just begging to be used in every dish possible. Even desserts!
It's still hot round these here parts, so I'm not in the mood to slave over a vat of garden vegetable marinara, tempting as the outcome might be. No. I want something easy to prepare and easy to eat. Something refreshing yet savory for a hot summer afternoon. So I think instead I'll completely contradict what I just said and make a vat of polenta, which is even more laborious than red sauce simply because you have to be standing right there at the hot stove for most of it, stirring your little heart out to make the perfect polenta. Good idea.
Lucky for me, and you, there is a cheat for this. This is not to say I don't recommend that you make your own polenta, because I do. But if you happen to be pressed for time, having a lazy day, or have a broken A/C like I do right now, you can always get a tube of pre-made polenta at most grocery stores and skip straight to the grilling, chopping, and, oh yes, chomping. Grilled Polenta Bruschetta, here we come:
POLENTA BRUSCHETTA
POLENTA (makes enough for about 1 dozen cakes)
INGREDIENTS:
6 cups fresh water
2 cups polenta
1-2 tsp salt
DIRECTIONS:
In a large pot, bring water and salt to a boil. Stir in polenta slowly.
Reduce heat and simmer, stirring a little more than occasionally for about 20 minutes or until your polenta is nice and thick. Seriously, a spoon basically should be able to stand up in the polenta.
Spread mixture in a lightly oiled or parchment-lined baking pan and refrigerate until firm.
Cut into squares.
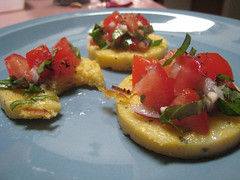
Brush each square with olive oil and grill each side for 3-4 minutes until you see grill marks. Or you can bake them until they're lightly crispy. Then top with tomato mixture below.
If you're using store-bought pre made polenta, simply slice the tube into rounds, brush each with olive oil and grill each side for 3-4 minutes until you see grill marks. Or you can bake them until they're lightly crispy. Then top with tomato mixture below.
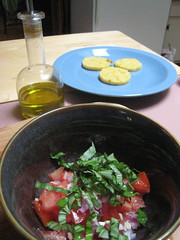
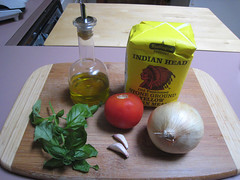
INGREDIENTS:
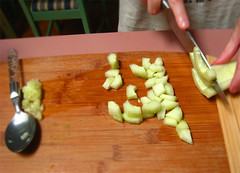
2 organic tomatoes washed, seeded & diced
1/2 small onion, chopped small [red or white works]
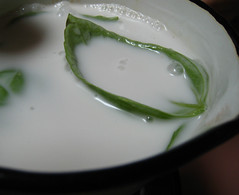
8 leaves of backyard basil, chiffonade
2 garlic cloves, minced
1/2 tbsp extra virgin olive oil
1 tsp sea salt
fresh cracked pepper
DIRECTIONS:
Remove core & seeds from washed tomatoes and dice. Sprinkle salt over tomatoes and let sit 15 minutes to a half hour. Meanwhile you can do all the rest of your slicing and dicing.
Add the chopped onion, garlic, and basil to the salted tomatoes and stir. Drizzle the olive oil over the topping mixture and mix it in.
Spoon the mixture onto your polenta cakes and finish up with a bit of fresh cracked pepper on top of each one. Devour! You probably won't have a problem getting your friends to help you eat all this, trust me, but if you do have extra polenta and topping around, they can be saved in the refrigerator separately. Assemble when you're ready to eat.